今回で、『concrete5 でケーキ屋さんのサイトを作ろう!』シリーズ4回目の記事です。
サンプルサイト作成方法の解説としては、順序立てたシリーズ記事になっていないかも知れませんが、『concrete5 関西ユーザーグループの勉強会』の開催にあわせた記事の公開になったりしていますので、お許しくださいませ。
また、毎度の長文になると思いますがお付き合いを…(ほとんど画像とコードで記事を占めていると思う…)
で、今回は『オートナビ・ブロック』のカスタマイズについてですが、デザインのカスタマイズは難しくないと思います。
というのも『オートナビ・ブロック』のデフォルト・テンプレートを見るとわかると思うのですが、書き出される HTML のコードは <ul> タグを使ったリスト形式です。
以前解説した『ページリスト・ブロック』のデフォルト・テンプレート場合は、 <h3> や <div> タグを使っていましたので、 <ul> タグを使ったリスト形式にカスタマイズしましたが、『オートナビ・ブロック』はデフォルトが <ul> タグのリスト形式なので、カスタマイズも簡単ではないでしょうか。
どちらかというと、『オートナビ・ブロック』の場合は、デザイン・カスタマイズよりも『設定』がちょっと難しいかも知れません。
難しいというより『クセがある』、『ややこしい』という感じかな…
ということで、デフォルトの『オートナビ・ブロック』を見てみましょう。
オートナビ・ブロックとは?
その名の通り、自動でナビゲーションの表示ができるブロック。
『ページリスト』と似ていますが、両者の違いは『オートナビブロックの使い方 :: concrete5 Japan 日本語公式サイト』をご覧いただくとわかりやすいと思います。
一般的には、グルーバル・ナビゲーション(メインメニュー)やサイドカラムのナビゲーション(ローカル・ナビゲーション)に使用することが多いと思います。
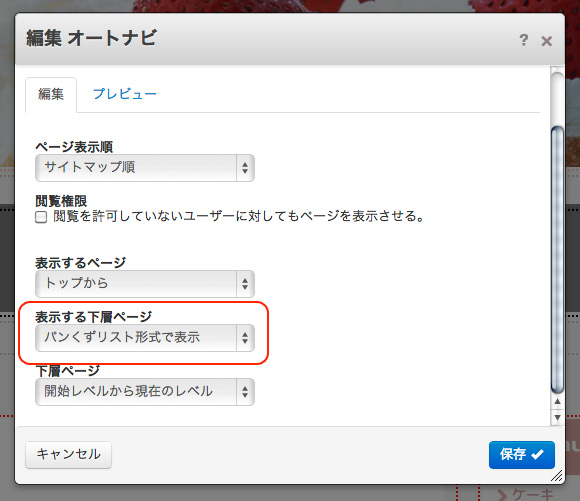
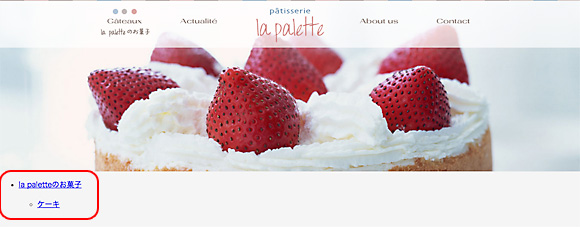
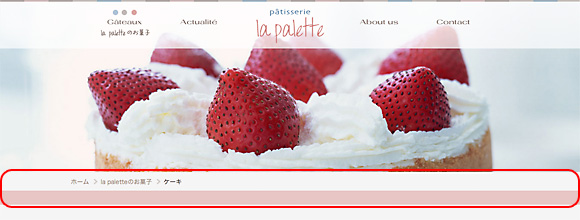
設定で、『パンくず・ナビゲーション』にも使うことができます。
まず、『オートナビ』を選択して、設定を変更せずに『オートナビ・ブロック』を『Main エリア』に追加してみます。
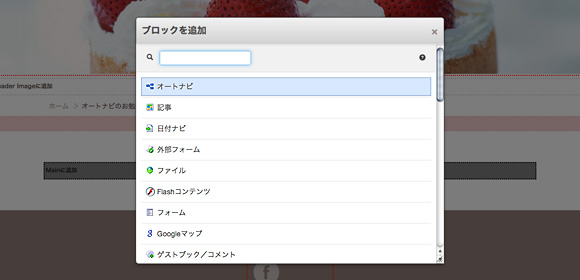
オートナビ・ブロックを追加
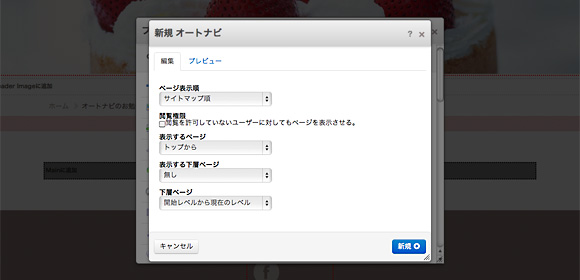
オートナビ・ブロックの設定は何も変更しない
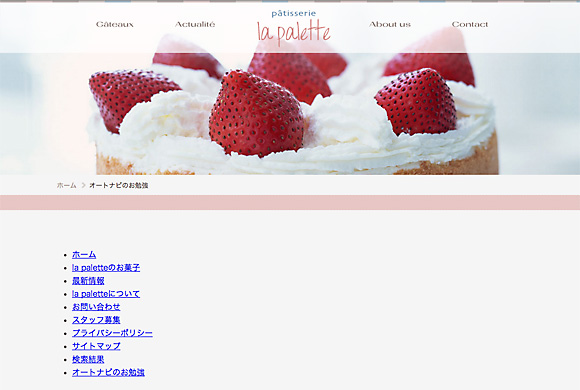
追加されたオートナビ・ブロック
次に『オートナビ』の設定のうち『表示する下層ページ』と『下層ページ』を『すべてを表示』に変更してみます。
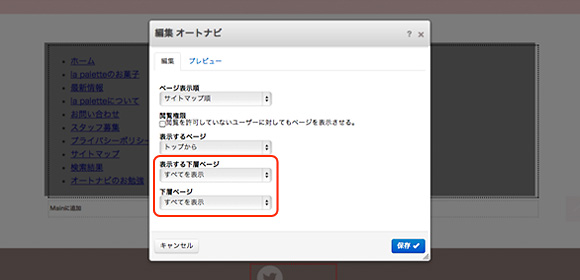
オートナビの設定を編集
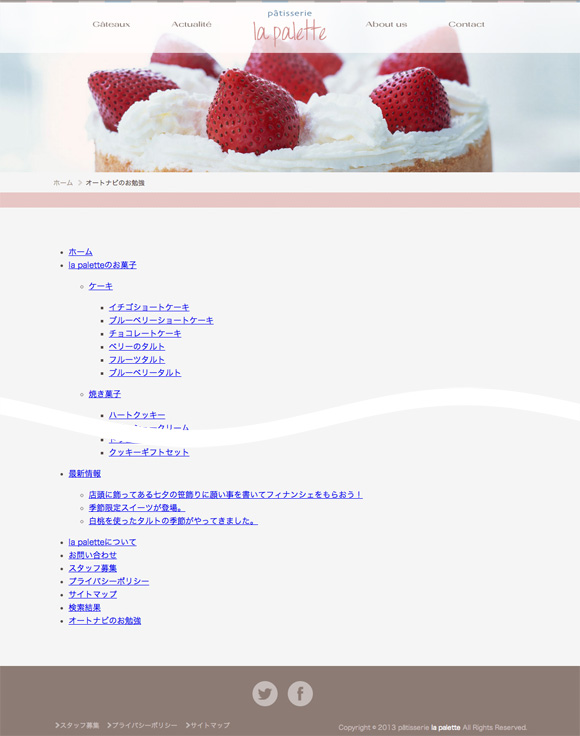
フルサイトマップと同じようにすべてのページを表示
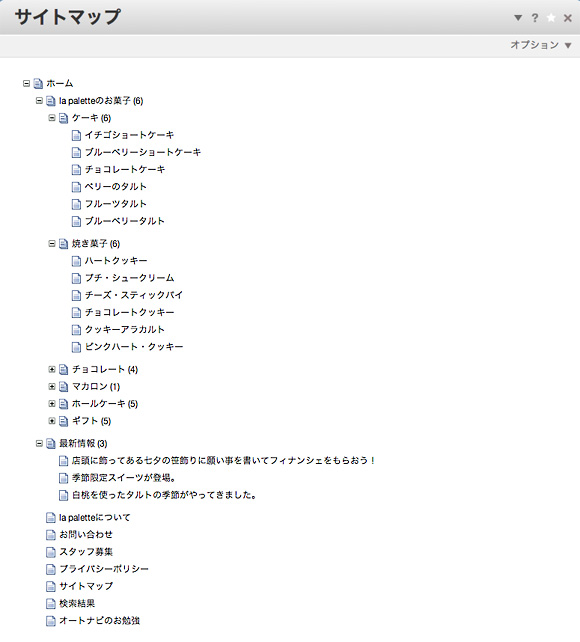
フルサイトマップと比べてみると…
このように『オートナビ』の設定を編集することによって、どの階層から表示するか、どの階層まで表示するか、などを変更できます。
設定項目は、
- ページ表示順
- 閲覧権限
- 表示するページ
- 表示する下層ページ
- 下層ページ
です。
最初の『ページ表示順』は、『サイトマップ順』以外に日付の『新しい順』や『アルファベット順』などがありますが、ナビゲーションとして使用する場合は『サイトマップ順』の一択ではないかと…
新着情報などを表示する『ページリスト』の場合は、『日付の新しい順』も使うでしょうけど、ナビゲーションの場合は使う機会がないと思います。
『サイトマップ順』に設定しておくと、フルサイトマップでページの順番を入れ替えてもナビゲーションに反映されますしね 🙂
次の『閲覧権限』は、通常のサイトではあまり使うことはないと思います。
残りの3つ、『表示するページ』『表示する下層ページ』『下層ページ』に関しては、ちょっと設定がわかりにくいですが、『concrete5オートナビブロックの使い方まとめ | notnil creation weblog』で詳しく解説されていますので、こちらの記事を是非お読みくださいませ。
オートナビのコードを見てみよう
ファイルは、これ。
[text gutter=”false” toolbar=”false” light=”true”]
インストールしたディレクトリ/concrete/blocks/autonav/view.php
[/text]
カスタム・テンプレートを作成する場合は、このファイルを複製します。
[php]
getNavItems();
/**
* The $navItems variable is an array of objects, each representing a nav menu item.
* It is a “flattened” one-dimensional list of all nav items — it is not hierarchical.
* However, a nested nav menu can be constructed from this “flat” array by
* looking at various properties of each item to determine its place in the hierarchy
* (see below, for example $navItem->level, $navItem->subDepth, $navItem->hasSubmenu, etc.)
*
* Items in the array are ordered with the first top-level item first, followed by its sub-items, etc.
*
* Each nav item object contains the following information:
* $navItem->url : URL to the page
* $navItem->name : page title (already escaped for html output)
* $navItem->target : link target (e.g. “_self” or “_blank”)
* $navItem->level : number of levels deep the current menu item is from the top (top-level nav items are 1, their sub-items are 2, etc.)
* $navItem->subDepth : number of levels deep the current menu item is *compared to the next item in the list* (useful for determining how many
- ‘s to close in a nested list)
* $navItem->hasSubmenu : true/false — if this item has one or more sub-items (sometimes useful for CSS styling)
* $navItem->isFirst : true/false — if this is the first nav item *in its level* (for example, the first sub-item of a top-level item is TRUE)
* $navItem->isLast : true/false — if this is the last nav item *in its level* (for example, the last sub-item of a top-level item is TRUE)
* $navItem->isCurrent : true/false — if this nav item represents the page currently being viewed
* $navItem->inPath : true/false — if this nav item represents a parent page of the page currently being viewed (also true for the page currently being viewed)
* $navItem->attrClass : Value of the ‘nav_item_class’ custom page attribute (if it exists and is set)
* $navItem->isHome : true/false — if this nav item represents the home page
* $navItem->cID : collection id of the page this nav item represents
* $navItem->cObj : collection object of the page this nav item represents (use this if you need to access page properties and attributes that aren’t already available in the $navItem object)
*/
/** For extra functionality, you can add the following page attributes to your site (via Dashboard > Pages & Themes > Attributes):
*
* 1) Handle: exclude_nav
* (This is the “Exclude From Nav” attribute that comes pre-installed with concrete5, so you do not need to add it yourself.)
* Functionality: If a page has this checked, it will not be included in the nav menu (and neither will its children / sub-pages).
*
* 2) Handle: exclude_subpages_from_nav
* Type: Checkbox
* Functionality: If a page has this checked, all of that pages children (sub-pages) will be excluded from the nav menu (but the page itself will be included).
*
* 3) Handle: replace_link_with_first_in_nav
* Type: Checkbox
* Functionality: If a page has this checked, clicking on it in the nav menu will go to its first child (sub-page) instead.
*
* 4) Handle: nav_item_class
* Type: Text
* Functionality: Whatever is entered into this textbox will be outputted as an additional CSS class for that page’s nav item (NOTE: you must un-comment the “$ni->attrClass” code block in the CSS section below for this to work).
*/
/*** STEP 1 of 2: Determine all CSS classes (only 2 are enabled by default, but you can un-comment other ones or add your own) ***/
foreach ($navItems as $ni) {
$classes = array();
if ($ni->isCurrent) {
//class for the page currently being viewed
$classes[] = ‘nav-selected’;
}
if ($ni->inPath) {
//class for parent items of the page currently being viewed
$classes[] = ‘nav-path-selected’;
}
/*
if ($ni->isFirst) {
//class for the first item in each menu section (first top-level item, and first item of each dropdown sub-menu)
$classes[] = ‘nav-first’;
}
*/
/*
if ($ni->isLast) {
//class for the last item in each menu section (last top-level item, and last item of each dropdown sub-menu)
$classes[] = ‘nav-last’;
}
*/
/*
if ($ni->hasSubmenu) {
//class for items that have dropdown sub-menus
$classes[] = ‘nav-dropdown’;
}
*/
/*
if (!empty($ni->attrClass)) {
//class that can be set by end-user via the ‘nav_item_class’ custom page attribute
$classes[] = $ni->attrClass;
}
*/
/*
if ($ni->isHome) {
//home page
$classes[] = ‘nav-home’;
}
*/
/*
//unique class for every single menu item
$classes[] = ‘nav-item-‘ . $ni->cID;
*/
//Put all classes together into one space-separated string
$ni->classes = implode(” “, $classes);
}
//*** Step 2 of 2: Output menu HTML ***/
echo ‘
‘, $ni->subDepth); //closes dropdown sub-menu(s) and their top-level nav item(s)
}
}
echo ‘
‘; //closes the top-level menu
[/php]
129行ありますけど、ほとんどがコメント文なので、デザイナーさんも怖からずにカスタマイズしましょうね 😀
このコメント部分に『オートナビ』をカスタマイズする上でたいへん便利なことが書かれています。
5行目から29行目までは、配列について。
例えば、16行目の『$navItem->name』は、119行目のように記述して『ページのタイトル』を表示します。
それぞれの値についても説明が書かれていますので、英語ですが一応読んでみましょう。
32行目から49行目までは、ページ属性について。
Handle: exclude_nav
これは、前回解説した『ページ属性』の『ナビから除く』です。
残りの3つは、それぞれのハンドル名で『ページ属性』を作る必要があります。
Handle: exclude_subpages_from_nav
これは『子ページをナビから除く』という名前にするとわかりやすいかも。
設定したページの子ページをナビゲーションに表示しなくなります。
Handle: replace_link_with_first_in_nav
この『ページ属性』が設定されていると、そのページではなく『最初の子ページにリンク』されます。
Handle: nav_item_class
スタイルシートでメニューボタンの背景画像を設定したいときなどに、任意のクラスを <li> に付加してくれます。
ただし、88行目から91行目のコメントを外す必要があります。
52行目から108行目までが、HTML に書きだす祭に <li> に付加されるクラスについて。
例えば、67行目から70行目のコメントを外すと、リストの最初の <li> に『nav-first』というクラスが付加されます。
このあたりのことも先ほどの『concrete5オートナビブロックの使い方まとめ | notnil creation weblog』に書かれていますので是非。
グローバル・ナビゲーションを作ってみよう
サンプルサイトのグローバル・ナビゲーションは、『オートナビ』を使わずに『Manual Nav』というアドオンを使っています。
理由は、『la paletteのお菓子 : Gâteaux』、『最新情報 : Actualité』、『la paletteについて : About us』、『お問い合わせ : Contact』の4つだけをメニュー項目として使用しますので、ナビゲーションに表示して欲しくないページが多過ぎます。
それらのページすべてに『ページ属性』の『ナビから除く』を設定するのも面倒くさい。
また、『グローバルナビに含む』という『ページ属性』を作るのも「何だかな〜」という理由です。
この『Manual Nav』アドオンはとても便利ですので、別の機会に紹介します。
で、今回は一般的なグルーバル・ナビゲーションを『オートナビ・ブロック』を使って作成したいと思います。
まず、どの項目をメニューに表示するか決めます。
サンプルサイトと同じように『la paletteのお菓子』、『最新情報』、『la paletteについて』、『お問い合わせ』の4項目 + 『la paletteのお菓子』のひとつ下の階層をドロップダウンで表示するようにします。
上記のサイトマップ画像の
- ケーキ
- 焼き菓子
- チョコレート
- マカロン
- ホールケーキ
- ギフト
ですね。
希望するようなリスト形式になるように『オートナビ』の設定をしてみます。
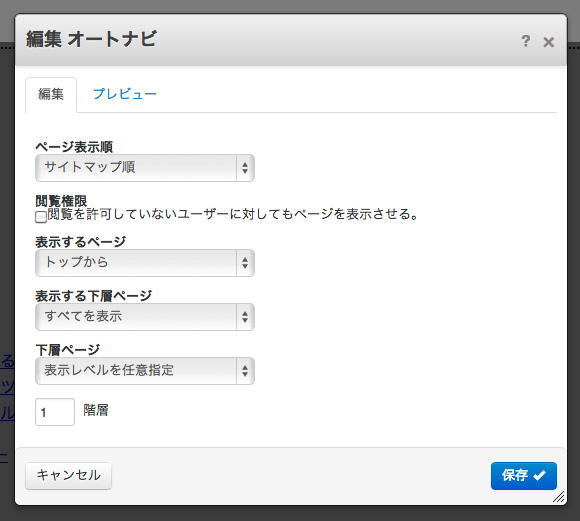
希望するリストになるように設定
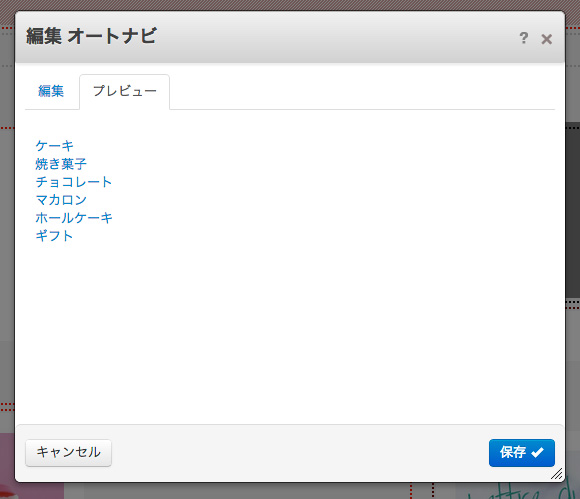
設定したらプレビューで確認してみます。
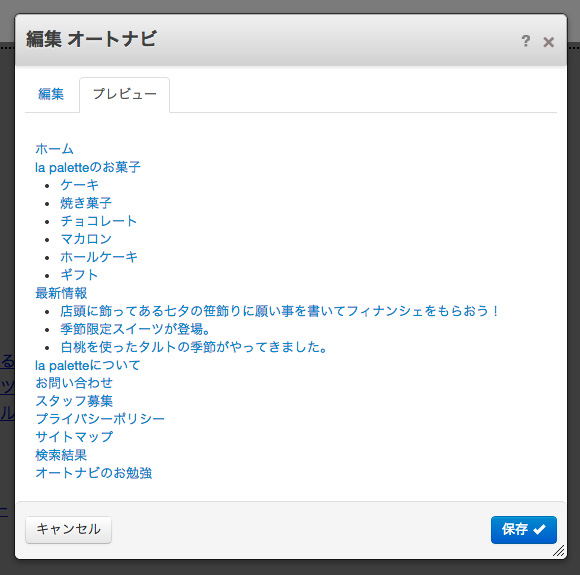
プレビューで確認してみる
基本的にはこれで OK。
表示させないページは、ページ属性の『ナビから除く』を設定。
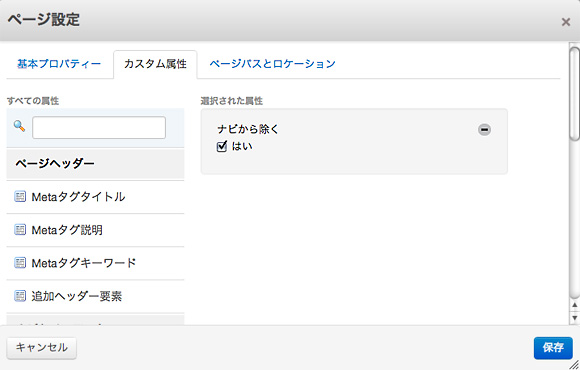
表示させないページに『ナビから除く』ページ属性を設定
もう一度プレビューで確認。
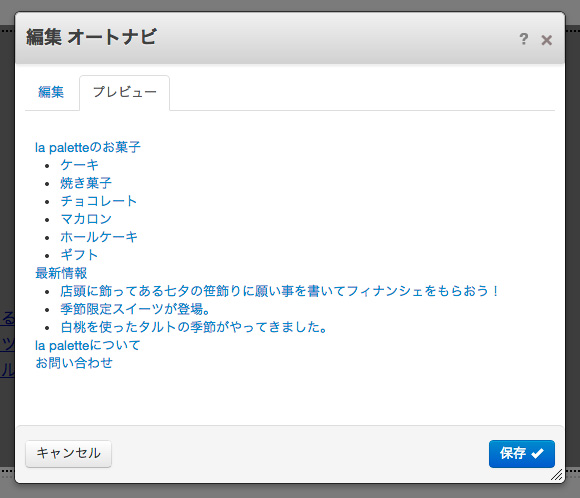
再度、プレビューで確認
このとき『最新情報』の子ページ(『白桃を使ったタルトの季節がやってきました。』など…)には『ナビから除く』ではなく、別の方法で表示しないように設定します。
というのも、『最新情報』の子ページは『最新情報』という性質上、これからの更新によってページが追加されていくはずです。
ページを追加する度に『ナビから除く』を設定するのも面倒くさいですよね。
そこで先ほどのオートナビのコードに書いてあったページ属性の『exclude_subpages_from_nav』を使います。
[php]
* 2) Handle: exclude_subpages_from_nav
* Type: Checkbox
* Functionality: If a page has this checked, all of that pages children (sub-pages) will be excluded from the nav menu (but the page itself will be included).
[/php]
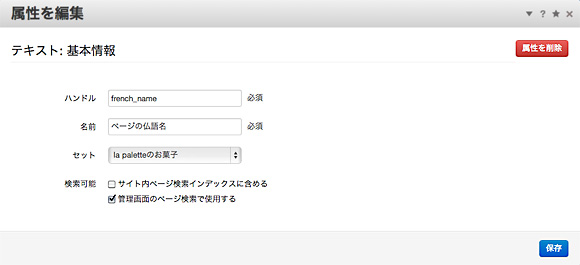
ハンドル名が『exclude_subpages_from_nav』、タイプは『チェックボックス』となっていますので、それにあわせて『ページ属性』を作ります。
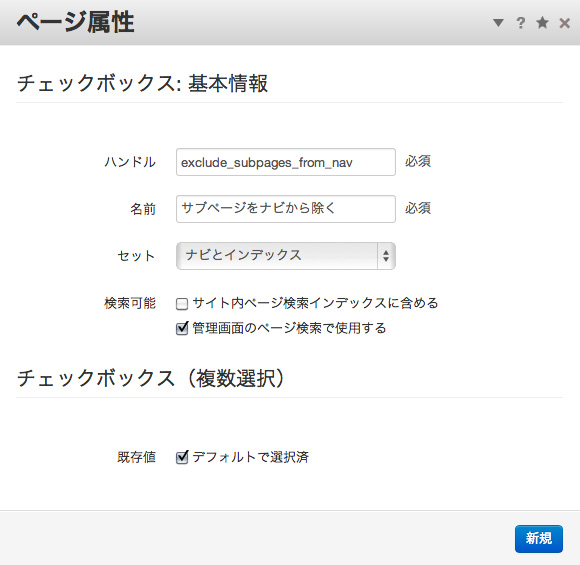
ページ属性『サブページをナビから除く』を作成
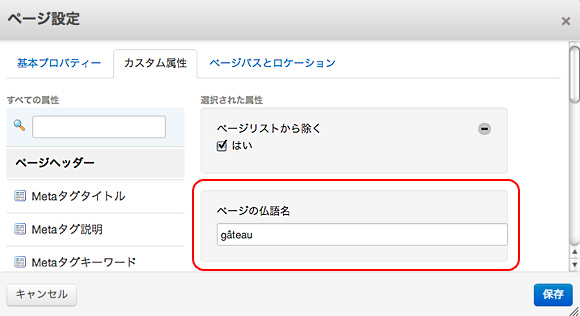
次に『最新情報』のページ設定で『サブページをナビから除く』を追加・設定します。
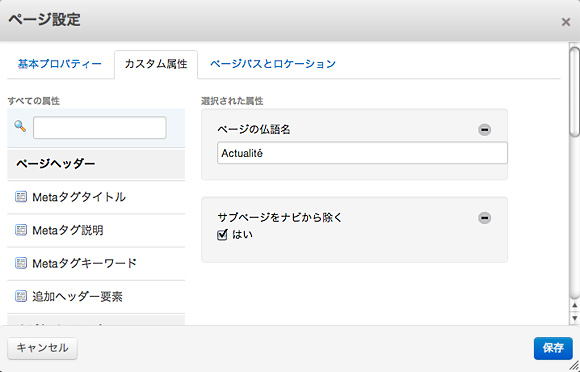
ページ属性『サブページをナビから除く』を『最新情報』ページに設定
再度、プレビューを確認してみます。
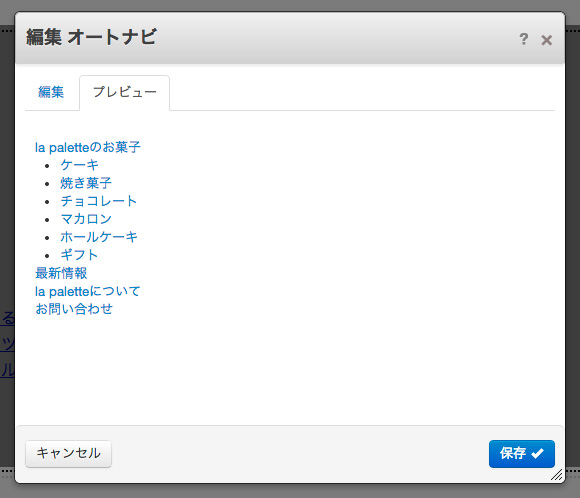
プレビューを確認すると希望するリストになっています
グローバル・ナビゲーションに表示したいリストになりましたので、ここで『オートナビ・ブロック』の HTML ソースを確認してみます。
[html]
[/html]
最初の方で書きましたが、すでに <ul> のリスト形式になっていますので、このまま <ul class=”nav”> に対してスタイルを設定してもかまわないと思いますが、デザイン・カスタマイズということなので『カスタム・テンプレート』を作ってみましょう 🙂
カスタム・テンプレートの作成方法のおさらい。
[text gutter=”false” toolbar=”false” light=”true”]
インストールしたディレクトリ/concrete/blocks/autonav/view.php
[/text]
を下記のディレクトリに複製し、グローバル・ナビゲーション用の css ファイルも同じディレクトリに設置。
[text gutter=”false” toolbar=”false” light=”true”]
インストールしたディレクトリ/blocks/autonav/templates/global_navi/view.php
インストールしたディレクトリ/blocks/autonav/templates/global_navi/view.css
[/text]
カスタム・テンプレートのコードは、
[php highlight=”19″]
getNavItems();
foreach ($navItems as $ni) {
$classes = array();
if ($ni->isCurrent) {
$classes[] = ‘nav-selected’;
}
if ($ni->inPath) {
$classes[] = ‘nav-path-selected’;
}
$ni->classes = implode(” “, $classes);
}
echo ‘
- ‘;
- url . ‘” target=”‘ . $ni->target . ‘” class=”‘ . $ni->classes . ‘”>’ . $ni->name . ‘‘;
if ($ni->hasSubmenu) {
echo ‘- ‘;
} else {
echo ‘
foreach ($navItems as $ni) {
echo ‘
‘;
echo str_repeat(‘
‘, $ni->subDepth);
}
}
echo ‘
‘;
[/php]
です。
コメント行をすべて削除しましたのでかなり行数が少なくなっていますが、元ファイルとの違いは19行目のクラス名だけです。
それ以外は何も変更・追記していません。
この <ul class=”g-nav clearfix”> のクラス名でスタイルを設定した css ファイルが、
[css]
.g-nav {
list-style-type: none;
width: 100%;
height: 40px;
margin: 30px auto;
padding: 0;
background-color: #dfb5b2;
border-bottom: 5px solid #d5a19d;
}
.g-nav li {
float: left;
width: 25%;
margin: 0;
padding: 0;
text-align: center;
position: relative;
}
.g-nav li a {
display: block;
margin: 0;
padding: 15px 0;
color: #fff;
font-size: 1em;
line-height: 1;
text-decoration: none;
border-left: solid 1px #fff;
}
.g-nav li:hover > a {
background: #fff;
color: #d5a19d;
-webkit-transition: all .2s ease-in-out;
-moz-transition: all .2s ease-in-out;
transition: all .2s ease-in-out;
}
.g-nav li ul {
list-style: none;
margin: 0;
padding: 0;
position: absolute;
top: 45px;
left: 0;
}
.g-nav li:last-child ul {
left: -100%;
width: 100%
}
.g-nav li ul li {
width: 100%;
height: 0;
color: #fff;
overflow: hidden;
-webkit-transition: .2s;
-moz-transition: .2s;
transition: .2s;
}
.g-nav li ul li a {
padding: 15px 10px 13px;
text-align: left;
font-size: .8em;
background: #d5a19d;
border: none;
}
.g-nav li:hover ul li {
height: 35px;
overflow: visible;
border-top: 1px solid #fff;
}
.g-nav li:hover ul li:first-child {
border-top: 1px solid #d5a19d;
}
[/css]
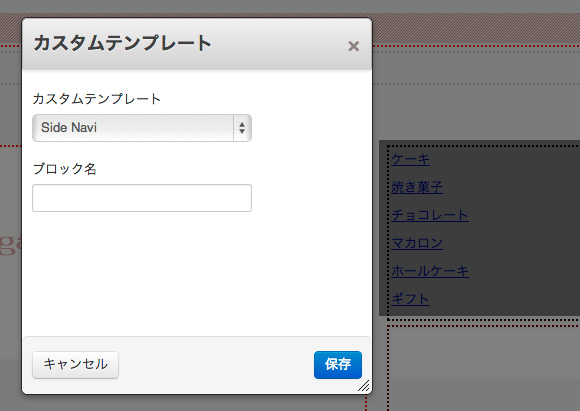
このカスタム・テンプレートを『オートナビ・ブロック』に設定します。
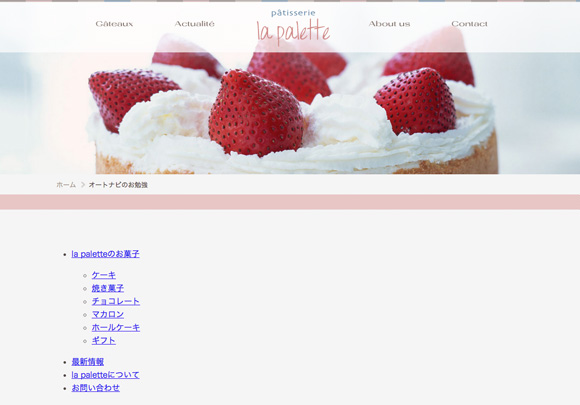
オートナビ・ブロック
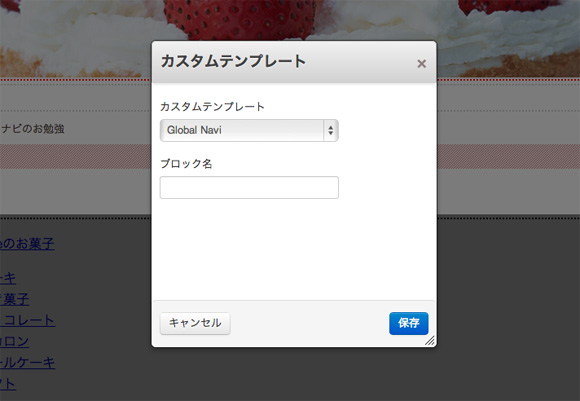
カスタム・テンプレートを設定
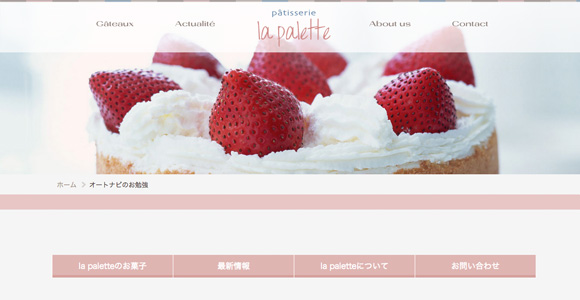
スタイルが適用されました
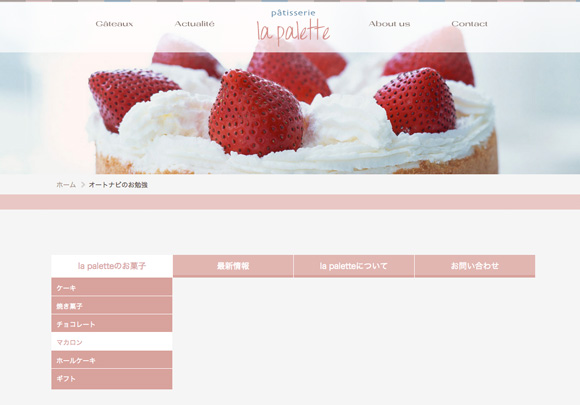
ドロップダウン・メニューも表示
これで『la paletteのお菓子』以下のサブページがドロップダウンで表示されるグローバル・ナビゲーションが完成です。
このようなグローバル・ナビゲーションの場合、カスタマイズといっても <ul> のクラス名を変更しただけです。
最初に書いた通り『オートナビ』のデザイン・カスタマイズは、全然難しくないというのを実感していただけたのではないかと思います。
あとは、カレントページ表示時のスタイルを css ファイルに記述するくらいかな。(カレントページには『nav-selected』というクラスが付加されます)
とりあえず、『オートナビ・ブロック』の基本的なカスタマイズは理解していただけたでしょうか?
サンプルサイトのオートナビ・ブロック
サンプルサイトで『オートナビ・ブロック』を使用しているところは3箇所です。
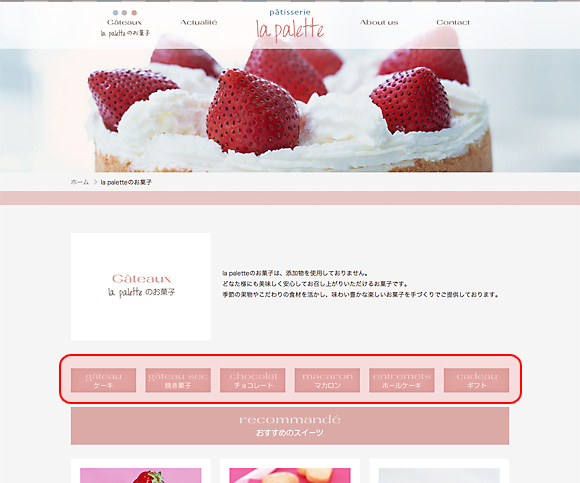
la paletteのお菓子ページのナビゲーション
『la paletteのお菓子』ページ中ほどのナビゲーション。
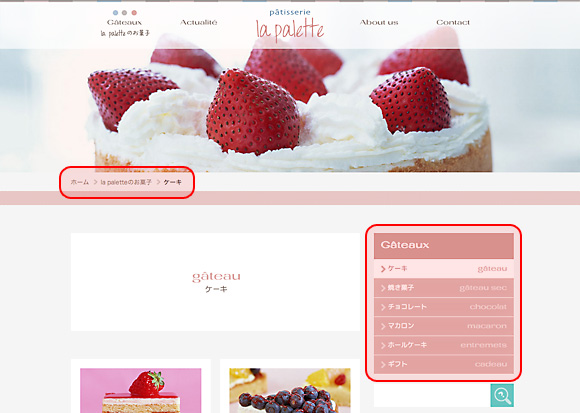
パンくずナビとサイドナビゲーション
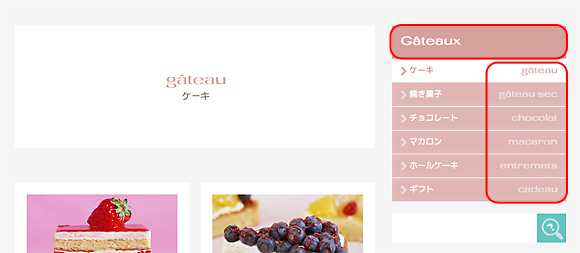
『la paletteのお菓子』ページのひとつ下の階層のサイドナビゲーションとパンくずナビが『オートナビ・ブロック』です。
それぞれ順番に解説していきますが、パンくずナビ以外は『ページ属性』を使ったカスタマイズになりますので、前回の記事を確認しながら読んでいただくとわかりやすいかも…
la paletteのお菓子ページのナビゲーション
まず、横一列に並んだメニュー。
これは前回の記事でも書きましたが『la paletteのお菓子メニューのオフ画像』という『ページ属性』をボタン画像として使用しています。
マウスオーバーで色が変化するのはスタイルシートで実現しています。
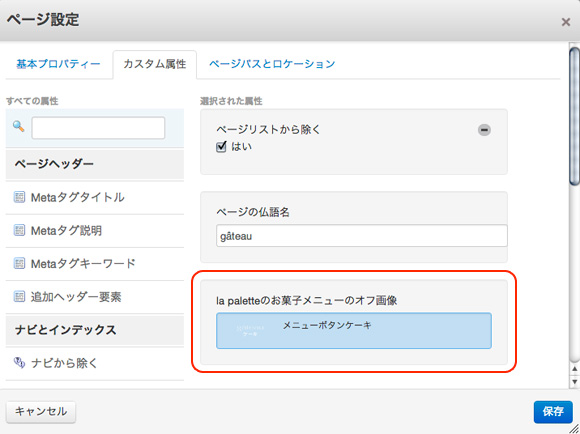
ページ属性でボタン画像を選択
わかりづらいですが、『gâteau ケーキ』というボタン画像を選択しています。
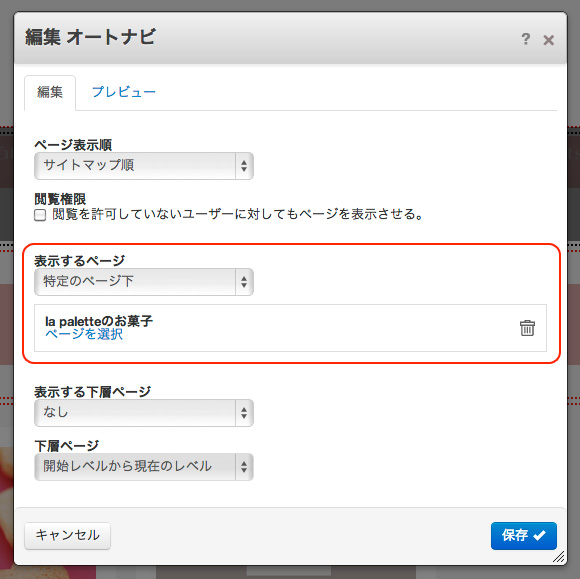
表示するリスト(階層)を指定
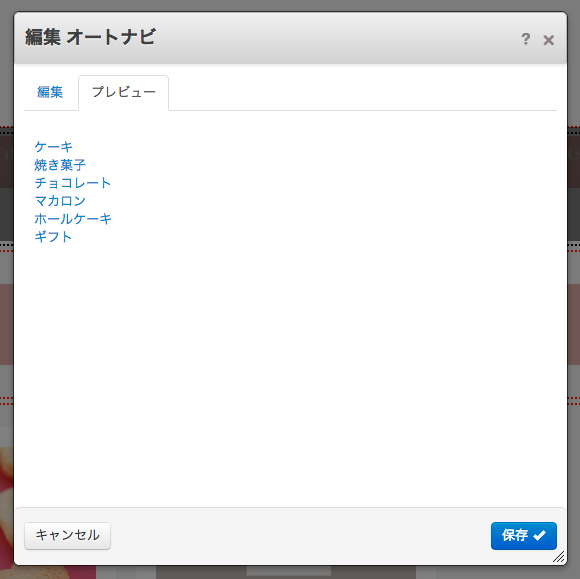
メニューに表示するリストをプレビューで確認
先ほど解説したグローバル・ナビゲーションのドロップダウン部分を表示するように設定しています。
この『オートナビ・ブロック』にカスタムテンプレートを設定するとla paletteのお菓子ページのメニュー表示になります。
カスタムテンプレートのコードは、
[php highlight=”24,28″]
getNavItems();
foreach ($navItems as $ni) {
$classes = array();
if ($ni->isCurrent) {
$classes[] = ‘nav-selected’;
}
if ($ni->inPath) {
$classes[] = ‘nav-path-selected’;
}
$ni->classes = implode(” “, $classes);
}
echo ‘
ですので、『ページ属性』で『画像/ファイル』を使用する場合には、画像が選択されていない場合の処理を必ず書きましょう。
最初、これがわからなくて「アワワ」ってなりました 😀
というわけで、書き直したカスタムテンプレートは、
[php highlight=”29,30,31,32,33″]
getNavItems();
foreach ($navItems as $ni) {
$classes = array();
if ($ni->isCurrent) {
$classes[] = ‘nav-selected’;
}
if ($ni->inPath) {
$classes[] = ‘nav-path-selected’;
}
$ni->classes = implode(” “, $classes);
}
echo ‘
